Arduino as a MIDI/Bluetooth Relay for Windows 8.1 Apps

In my last post I described how a Bluetooth connection between Arduino and a Windows 8.1 device can be established.

The next step for me was to connect the Arduino to my electronic drum kit which has both, a MIDI-IN and a MIDI-OUT jack, but any other electronical instrument will do as well.

The wiring diagram for an Arduino Uno R3 with MIDI-IN/OUT and the JY-MCU Bluetooth module is shown in Fig.1. NOTE: Occasionally there are MIDI shields available for Arduino, so you might not have to build it on your own.

Fig.1: You'll need a few resistors, a diod, an optocoupler and preferably one or two DIN-jacks

Fig.1: You’ll need a few resistors, a diod, an optocoupler and preferably one or two DIN-jacks

The Arduino code to relay MIDI>Bluetooth and Bluetooth>MIDI is actually quite simple.

//======================================================authorship
//by Michael Osthege (2013)
//======================================================includes
#include "SoftwareSerial.h"
//======================================================constants
const int TX_BT = 10;
const int RX_BT = 11;
const int MIDI_TX = 1;
const int MIDI_RX = 0;
//======================================================bluetooth setup
SoftwareSerial btSerial(TX_BT, RX_BT);
//======================================================initialization
void setup()
{
    Serial.begin(31250);
    btSerial.begin(9600);
    Serial.println("Bluetooth initialized");
}
//======================================================do work
void loop()
{
    ReadMIDI();//listen on the MIDI-IN
    ReadBluetooth();//listen for Bluetooth
}
void ReadMIDI()
{
    if (Serial.available() > 0)//there's something in the buffer
    {
        char buffer[3];
        Serial.readBytes(buffer, 3);//receive it
        btSerial.write(buffer[0]);//relay it
        btSerial.write(buffer[1]);
        btSerial.write(buffer[2]);
    }
}
void ReadBluetooth()
{
    if (btSerial.available() > 0)//there's something in the buffer
    {
        char buffer[3];
        btSerial.readBytes(buffer, 3);//receive it
        Serial.write(buffer[0]);//relay it
        Serial.write(buffer[1]);
        Serial.write(buffer[2]);
    }
}

As I understand it, the MIDI protocol communicates with commands of three bytes. Therefore I decided to relay all incoming serial messages in chunks of three bytes.

To test the relay, I modified the BluetoothConnectionManager of my previous example to send/receive chunks of 3 bytes as MIDI commands too. Incoming commands are printed into lines of text and simple sounds can be sent as well.

You can try it out yourself in this sample application: http://code.msdn.microsoft.com/Arduino-as-a-MIDIBluetooth-1c38384a

Have a nice weekend =)

Bluetooth communication between Arduino and Windows 8.1

Introduction

Recently, after being inspired by this video of Arduino Bluetooth communication with Windows Phone 8 by Marcos Pereira, I got myself some new devices to play with:

  • Arduino Uno R3 in a starter kit (link)
  • JY-MCU Bluetooth module (link)
  • and a few extra cables

The thing is: I don’t have a Windows Phone 8 yet and the Windows Phone 7.8 APIs do not support this kind of Bluetooth communication.

But: I have a Surface RT and with Windows 8.1 the RFCOMM API can be used to establish a serial link to the Arduino.

Arduino and Visual Studio

It happens that my developing skills are quite limited to C# and when I had to develop some Kinect software with Processing in early 2012, I almost freaked out. Arduino code is written in C++  and the standard Arduino IDE is derived from the Processing IDE. Fortunately there’s the Visual Studio extension VisualMicro which brings a very intuitive Arduino support for VS2010-VS2013. (not available for Express versions)

You can get VisualMicro for free at http://visualmicro.codeplex.com/. They also offer a pro-version (>$20) with support for Breakpoint-Debugging.

The Arduino IDE should be installed as well and you have to tell the VisualMicro extension where to find it.

Setting up the Arduino board

For the setup I’ll show here, I set up two LEDs, a potentiometer and of course the Bluetooth module (Fig.1).

Arduino UNO R3 with 2 LEDs, a potentiometer and a Bluetooth module

Fig.1: Arduino UNO R3 with 2 LEDs, a potentiometer and a Bluetooth module

Preparing the Code

The Arduino has to be loaded with some code to send and receive Bluetooth messages. I created a Visual Studio solution with a blank Windows 8.1 app and a new Arduino sketch and added a new header file “SoftwareSerial.h” (Fig.2). The code of SoftwareSerial.h can be found here.

A blank VS 2013 solution was created to which a blank Windows Store 8.1 application and an Arduino sketch were added.

Fig.2: A blank VS 2013 solution was created to which a blank Windows Store 8.1 application and an Arduino sketch were added.

The actual Arduino code can be studied in the sample application: http://code.msdn.microsoft.com/Bluetooth-communication-7130c260

For the Windows 8.1 app we build a class, BluetoothConnectionManager to simplify enumerating, connecting, send & receive and state management. The code of the BluetoothConnectionManager and the actual application can also be studied in the sample application.

For the Windows 8.1 app it’s very important to declare the right Bluetooth capabilites. The following snippet should be included in Package.appxmanifest:

<Capabilities>
    <m2:DeviceCapability Name="bluetooth.rfcomm">
      <m2:Device Id="any">
        <m2:Function Type="name:serialPort" />
      </m2:Device>
    </m2:DeviceCapability>
  </Capabilities>

As soon as you have everything set up, the Arduino code can be deployed via Debug\Start new instance and the Windows 8.1 app can be launched.

In the sample application I implemented broadcast of the potentiometer value and switching the LEDs on/off. Additionally the red LED automatically turns on/off depending on the analog value.

One problem that this implementation brings, which I did not yet solve, is that simultaneous sending of a message by either party causes the other one to crash or get an exception. But due to my lack of experience, I do not know how to lock the streams to prevent this from happening..

Anyways, have fun =)

A Custom (Async) MessageBox for WPF and Windows Phone

The System.Windows.MessageBox provided by .NET is limited to a very small set of MessageBoxButtons (Yes/No/OK/Cancel) which do not allow for custom Button texts. The System.Windows.Forms.MessageBox also blocks the UI thread, which can be an annoying disadvantage as well.

The MessageBox on Windows Phone has the same disadvantages.

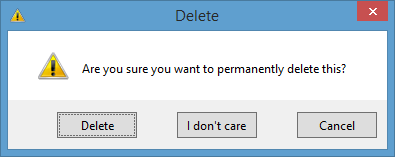
Custom buttons in a MessageBoxe simplify the decision for the user, because they can describe the results of the action:

Use your own buttons and await the result!

Use your own buttons and await the result!

This MessageBox does not block the UI thread!

This MessageBox does not block the UI thread!

However you need to do this with a custom control, so for WPF as well as Windows Phone I designed a simple method for asynchronously showing a MessageBox with custom buttons. (The WPF implementation based on this control by Evan Wondrasek)

So let’s bring some sample code.In WPF you can use multiple custom buttons:

asynchronously show a CustomMessageBox - int result is the number of the selected button, or the default

asynchronously show a CustomMessageBox – int result is the number of the selected button, or the default

And on Windows Phone you’re limited to 2 buttons:

asynchronously show a CustomMessageBox - int result is the number of the selected button, or the default

asynchronously show a CustomMessageBox – int result is the number of the selected button, or the default

To use CustomMessageBox, you need to get TCD.Controls from NuGet:

Install the TCD.Controls package from NuGet

Install the TCD.Controls package from NuGet

And on Windows Phone 7.x you also need async support, which is included in the Microsoft.Bcl.Async package:

Microsoft.Bcl.Async is required for async/await on WP7

Microsoft.Bcl.Async is required for async/await on WP7

Just like the other methods from TCD.Controls, CustomMessageBox also features IntelliSense descriptions (or I’ll add them very soon).

Please feel free to provide feedback and/or report bugs 😉

In-App Donations for Windows 8 Apps

Recently I wanted to offer my customers the opportunity to donate some money. No extra features, just a clean donation option.

In-app purchases seemed to be the best option. The idea is to have a list of products which have a price and contain “donate” in their product ID (Fig. 1).

Fig. 1: in-app products contain “donate” in their product name.

Fig. 1: in-app products contain “donate” in their product name.

In the app the list of products can be retrieved and shown when a donate button is tapped. If donations have been given can be checked by enumerating the existing licenses and looking for the “donate” term (Fig. 2).

Fig. 2: The buttons first indicates its activity and then shows the available in-app donation products.

Fig. 2: The buttons first indicates its activity and then shows the available in-app donation products.

Reasonably simple right? Well the principle is simple, but in-app purchases are a bit tricky to develop, debug and get through certification. (It took me 7 submissions to get it right..)

Those are the things that can result in certification failure:

  • no internet connection -> exception
  • store does not respond properly -> exception
  • error message looks to much like a error message -> fails requirement 3.2

The CurrentApp static class offers the methods to retrieve LicenseInformation and to execute purchases, but it won’t function until the app is actually released. Therefore you have to use the CurrentAppSimulator – conditionally depending on the build mode. For example:

#if DEBUG
return CurrentAppSimulator.LicenseInformation;
#else
return CurrentApp.LicenseInformation;
#endif

Even in the certification environment, the store does not know your app, which results in an exception!

As you usually need to handle this, its common practice to show a MessageDialog informing the user what has gone wrong. The dialog should not look like a error message, but rather like a information, otherwise the tester might decide to let you fail said requirement 3.2!

As I want to offer in-app donations in multiple of my apps, I created a UserControl for it – the AppBar button you saw above.

I set up a code sample at MSDN, so you can take a look at the code there =)

2 months Surface RT – some thoughts from scientists perspective

There are countless reviews on the Surface RT already, but I consider myself some kind of non-average user, so I’d like to share my experience too.

To understand my argument on the device, you should know:

Who I am

I am a undergraduate Biology student from Germany with some experience in WPF/Multitouch/Kinect/Windows Phone/Windows 8 development using C#. Most software I write is just for personal use, but I published some of my work (WP7, Win8) as well. Since the launch of the first public beta, I‘ve been using and developing for the Windows 8 platform, so I have a reasonable understanding of what’s going on.

The Surface RT is my very first tablet computer. I’ve considered to get other devices (HP ElitePad, Samsung – ARM as well as x86), but decided that the Surface RT was the best fit.

Everyday tasks

Just like my HTC Mozart, I use the Surface a lot. It accompanies me to lectures, in the lab, or when travelling by train. Except for watching my favorite TV series, I don’t use it for entertainment (gaming, music), but for creating, or studying.

Lecture

In a lecture I  take notes and or follow the slides and maybe sometimes even browse Reddit or Facebook. Before the Surface, I used to do this with my phone, usually causing the battery to be dead until 4 PM..

+ taking notes, following slides

+ less smartphone-battery drain

+ charge the phone in the lecture =D

– PDF editing (Reader, PDF Touch) apps need to be improved

Traveling

I travel about 5 hours a week by train and use the Surface to watch my favorite TV series, or to go through lecture slides (aka study). To connect to the internet, I need to use my phones Internet Sharing, but I usually don’t do that, because A there’s almost no connectivity on the train and B due to my 50 MB data contract, it’s painfully slow. (Actually not significant for Twitter/FB/Mail on the phone.)

Sometimes I use the time on the train to write protocols, which involves a lot of Word and Excel. Equipped with a type cover, I can be productive without carrying something big and heavy.

In the Lab

As I mentioned, I‘m studying Biology, so we have a lot of internships/lab work where we do experiments and stuff. We need to write protocols on the experiments – that’s where Surface comes in. Taking measurements and pictures can be a lot of work (and chaotic) if you don’t have the right setup. For that purpose I wrote an app that can be used to manage the data, pictures, videos and files of many experiments while maintaining their context.

The data is not synced to the cloud or something (I’m just not that good..), but stored in either the app, or a folder you can select. In my case it’s a BitLocker-encrypted 16 GB USB key (you can see it in Figure 2 below) drive (8.50 €).

Figure 2: You can make a tree-like structure for your experiments and add fields of data, as well as files.

Figure 2: You can make a tree-like structure for your experiments and add fields of data, as well as files.

Figure 2: You can make a tree-like structure for your experiments and add fields of data, as well as files.

Figure 2: You can make a tree-like structure for your experiments and add fields of data, as well as files.

There are still many things I’d like to improve about the app, but I already use it heavily in the lab.

This is exactly the kind of use case where the Surface RT scores best, because of its long lasting battery, robustness, performance, weight and of course the USB port.

When taking a lot of measurements wich would usually be stored on paper, I can immediately type them into the Excel sheet instead.

The only disadvantage of Windows RT at this point may be that you can’t run the specialized software you usually work with as a scientist (device-specific control software, ImageJ, or other software you probably never even heard of). Technically Windows RT apps are perfectly capable of these things, but most of the time you’re using software which hasn’t been updated for many years, or even decades (no kidding, take a look at Figure 3!) and therefore won’t be ported anytime soon..

Figure 3: I have no idea how old this thing is, but it's frequently used!

Figure 3: I have no idea how old this thing is, but it’s frequently used!

With a Windows 8 Pro tablet one could analyze the data, but for capturing stuff the Surface RT is great and you can still use it as a real tablet as it does “connected standby”, the battery lasts longer etc.!

I love my Surface RT, use it a lot and can absolutely recommend it to anybody else. There are tons of things I didn’t mention and lots of RT apps to come =)

I’d also love to hear your thoughts on non-mainstream use cases^

Localizing Enums (in a ComboBox)

Enums have many useful applications and are often used in CoboBoxes to let the user select things. In the code behind the enum values are often defined using more or less cryptic text, because neither spaces, special characters, or leading numbers can be used in enum values (for good reasons!). Therefor it is necessary to change the text to something more understandable (language-localized in some cases).

One way to achieve this is to create the ComboBox items manually, but it’s much more comfortable to fill the ComboBox items directly with the enum values, because you can get/set the SelectedItem without converting it back and forth from/to the enum value.

You can’t override the .ToString() method of the Enum type, so we have to come up with another solution.

Just like any other control, the ComboBox uses a Template to create its items. We will replace the default template with one that uses a Comverter to populate the items.

The converter will be called “EnumNameConverter” and that’s its code:

EnumNameConverter

As you can see the converter checks if the passed value is of type Enum, so if it’s ‘misused’ it will not throw an Exception. Then it calls an extension method ‘GetValueName’ that will care for converting the Enum to a string. (We could do this in the Converter as well, but if we do it in an extension method, you can use it independently of the Converter.)

That’s the code of the GetValueName extension method:

GetValueName

We have three options to convert the Enum value to a string:

  1. If the GetValueNameMethod was set to something (I’ll come back to that later)
  2. The System.ComponentModel.DataAnnotiations.Display Attribute (its Name property) can be used to describe an Enum’s value directly in the definition – the downside: it only allows for static values, thus no localization logic is available
  3. The inherited .ToString() method that would be used by the default template

If either of the methods returns a null/whitespace/empty string, we will fall back to the next one.

Now let’s talk about the GetValueNameMethod property. It’s a static property of the EnumExtensions class. You can set it to any method of type void(string) of your liking. And it just happens that if you implement resource localization like explained in the samples (keyword: x:Uid) you will have a GetString(string) method that returns the localized string from your resource file. To localize an Enum you need to add a new entry to your Resources.resw file:

Key: EnumName_EnumValueValue: LocalizedEnumValue

Key: EnumName_EnumValue
Value: LocalizedEnumValue

Now we can localize any Enum value to a string using the Enum.Value.GetValueName() method.

For the ComboBox to use the Converter, we need to define the new ItemTemplate. That’s the code:

EnumItemTemplate

To use the template from an extension method, a few tricks have to be used. I won’t go into the details, but you can contact me if you want to know^

For the TCD.Controls package, I wrote another extension method (to the ComboBox type) that applies this template for you. Just call .UseEnumItemTemplate() on the ComboBox you want to use with Enums.

Bottom line:

  • EnumExtensions.GetValueNameMethod
    • set this to your LocalizedStrings.GetString(string) method
  • Enum.Value.GetValueName
    • returns localized string, DisplayAttribute.Name, or .ToString
  • ComboBox.SetUpItems
    • fill the ComboBox with enum values (take a look at the overrides/parameters!)
  • ComboBox.UseEnumItemTemplate
    • prepare the ComboBox for the Enum items

I’ve uploaded a code sample to the MSDN sample gallery as well: http://code.msdn.microsoft.com/Localizing-Enums-in-a-27932222

Keyboard Dismissing ComboBox

In the last few days I came across a design issue with the touch keyboard on Windows 8. The keyboard dismissal logic (documented here) defines a list of controls which do not cause the keyboard to dismiss when they get focused. The purpose is to prevent the keyboard from opening and closing all the time when the user fills out a form and is likely to switch between keyboard-editable controls such as TextBox and other controls like AppBar, Checkbox, RadioButtons the ComboBox and some more.

While that works fine with the other controls, ComboBox expands when interacted with and might get covered by the touch keyboard. And unfortunately you can’t change that behavior, or manually dismiss a deployed touch keyboard. (The user is in complete control over the keyboard.)

While on the MSDN forums it was suggested to alter the layout such that the ComboBox is less likely to collide with the touch keyboard, this was unacceptable in my case. (Screenshot below…)

Screenshot of my app, where I first met the problem

Screenshot of my app, where I first met the problem

I decided to go for a user control that encapsulates a real ComboBox, but intercepts the pointer, causing the keyboard to dismiss. This is done by setting IsHitTestVisible=false on the ComboBox and set it to true after the container (a Button control) was tapped (and caused the keyboard to dismiss). Because the ComboBox did not handle the tap, it need to be opened manually. You can of course control a ComboBox with the keyboard as well (arrow keys, space, enter, tab) and I had a few issues with that, but finally I got it right and now you can’t distinguish the KeyboardDismissingComboBox from a real one 😊

The KeyboardDismissingComboBox exposes the underlying ComboBox as a property so you can manually edit the items, subscribe to SelectionChanged or edit the template. However, you should not touch the IsHitTestVisible property, as this is vital to the dismissal behavior.

I for my part use ComboBoxes often to let the user select an enum value. For that reason I created an extension method (SetUpItems) to the ComboBox type which can be used to fill it with the values of an enum (first override) and optionally select the default item upon initialization (second override). The only limitation is that you can’t do that from XAML, but from Runtime only.

The control is now part of the TCD.Controls package on NuGet.

Please feel free to report bugs, or suggest changes 😉

TCD.Web.NotiConn – communicate between handsets without a server

Two days ago, when I was cycling, suddenly I had the answer:

Imagine you have two Windows Phone 7 devices and want to establish a two-way connection between them. For example to play a game of Tic-Tac-Toe. You can do this either with a server on the internet, that connects the clients with each other, or the multicast protocol on WiFi-networks. The same WiFi network may not always be available to both users, but you don’t want to set up a server either (maybe, because you’re only doing this for fun, or you don’t have the resources).

The only way to send messages to a WP7 app via the internet is to use push notifications. But how do you exchange the channel addresses between the devices? One way is to use a QR code:

  1. Establish a push notification channel on both devices
  2. Encode the channel URI into a QR code
  3. Scan the QR code of the other device
  4. Send a message with your own channel URI to the other device
  5. Connection established =)

Other methods of exchange can be used as well, for example NFC. You could as well require the user to mail, copy and paste the channel URI, but this is not very convenient.

To my knowledge, push notifications on Android ad iOS work pretty much the same, so you can do this cross-platform as well.

Here are a few screenshots of the sample application (link below), which features a simple chat between the two devices.

Oh and by the way: this works with multiple clients as well!

Here you can download the sample application, or the NuGet package

cheers

TCD.Mathematics

UPDATE: Source and samples for WinRT and WPF are now on GitHub: https://github.com/michaelosthege/TCD.Mathematics

This is just a quick post to introduce you to TCD.Mathematics, which is a NuGet package that adds several extension methods to the System.Windows.Media.Media3D namespace. If you’re unfamiliar with this namespace, it contains Point3D, Vector3D, Line3D and Plane3D classes which can be used for three-dimensional calculations.

EDIT: I just submitted an update to the NuGet package, wich adds support for WinRT. Please not that WinRT does not have neither Point3D, Vector3D, nor the System.Windows.Media.Media3D namespace. So in WinRT all classes, including substitutes for Point3D/Vector3D are located under TCD.Mathematics.

EDIT: Since version 1.2.0 TCD.Mathematics is a Portable Class Library that targets everything: Silverlight 4+, .NET4+, .NET for Windows Store, Windows Phone 7+, Xbox360 – make sure you’re running version 2.1+ of NuGet Package Manager!

The extension methods, which are added to the mentioned Point3D/Vector3D classes are:

  • Vector3D.AsPoint3D()
  • Point3D.AsVector3D()
  • Vector3D.Normalized()
  • Point3D.CenterOfClusterWithOtherPoint3Ds ()
  • Point3D.ProjectOnLine3D()
  • Point3D ProjectOnPlane3D()
  • Point3D.DistanceToPlane3D()

The new classes are Line3D and Plane3D. A Line3D can be intersected with a Plane3D (.IntersectWithPlane3D()) and both of them can be defined using different parameters. Line3D has a static method to calculate the ‘approach’ between two lines as well.

Due to the math behind, a variety of methods (and even constructors) can cause exceptions, which are defined in the TCD.Mathematics namespace. So please do your homework and don’t try to calculate illegal stuff, or try{}catch{} your calculations.

The IntelliSense descriptions are very extensive 😉

In case of questions, bugs or suggestions, or even if you like this package, please don’t hesitate to drop me a line =)

cheers^

TCD.Kinect

EDIT: If you’re interested in Skeleton tracking and calculating 3D stuff, take a look at TCD.Mathematics too^^

EDIT: There’s a WPF application that I once wrote, featuring SkeletonPainter3D: Kinect Sword. There’s a Youtube video of it (http://youtu.be/2j6GCd4M1bA) and that’s the source code: http://dl.dropbox.com/u/7813771/Blog/CodeSamples/KinectSword.zip


Hello there,

I’ve created another UserControl, this time for Kinect and .NET 4.5, which hopefully has the potential to save you a lot of time. It can be used to draw three-dimensional Skeletons and explore the virtual space around them in real-time. A picture may be more appropriate:

The control can be constructed in XAML:

xmlns:kinect=”clr-namespace:TCD.Kinect.Controls;assembly=TCD.Kinect.Controls”

<kinect:SkeletonPainter3D x:Name=”painter” Background=”Black” IsAnaglyphEnabled=”False” CameraFieldOfView=”70″ CameraPosition=”0,0.5,-1″ CameraLookAt=”0,0,2″ />

And populated with Skeletons using painter.Draw(skeletons), where skeletons is an Skeleton[] from inside the SkeletonFrameReady event.

You can either get the TCD.Kinect package from NuGet, or refer to the sample implementation: http://code.msdn.microsoft.com/Implementation-of-f175b025

Let me know if you have any questions or suggestions, and by the way: SkeletonPainter3D has an experimental 3D Anaglyph mode!

cheers